
Here is part 2 of the ADU series. In this article, we will discuss the beginning steps and how my fiancé and I wanted to design the unit.
First thing first, here are some features of the unit that we felt were important:
- Washer/dryer hook ups: Because we were already running plumbing, and knowing that it is extremely important for tenants, it was a no-brainer. We incorporated it into the bathroom for efficiency of plumbing and space.
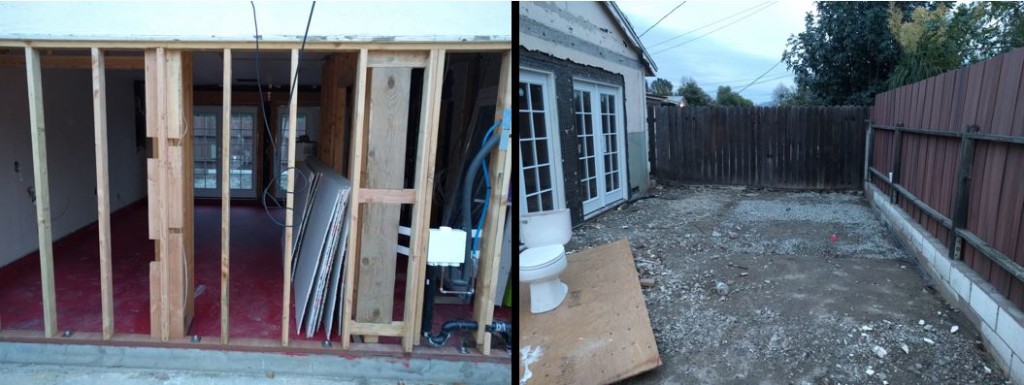
- We closed the doors and windows that were facing the yard: This was to provide privacy for both the tenants and us (or later, whoever we rent the main house to). We made sure that the front door had a window, and we added two French doors out the back for natural lighting.
- No gas and shared water: In an effort to save time and money, we made the entire unit electric. This way we didn’t have to deal with the gas company, pay their fees, and saved on running gas lines. The cost of an electric hot water heater was the same as a traditional one. For the water, it was going to cost somewhere in the line of $5,000 to have the unit separately metered. Because it is so small, we didn’t feel the return on investment would be worth it today. This is especially true because we are going to live in the main house. Later, we can investigate the option, or investigate sub meters pending laws and building codes.
- Create a backyard: Because the yard wraps around to the back of the ADU, it only made sense to give the unit its own yard. By having an outdoor experience for the unit, it can create value for both marketability and for higher rents. It would be as if it is a little house.
Some initial tips for the first stage:
- Order the doors and windows ASAP: We went out of our way to find doors that were in stock. However, if you are thinking that you are going to have to order them, it can take 4-6 weeks. This includes standard sizes, as they are generally made to order. That means as soon as you get the approved plans (from the architect with the City’s green light), you need to order the doors and windows. This can be a huge delay because the City will not allow you to work on the inside of the unit until they are installed. The idea behind it is because if it rains, the City doesn’t want water to get into the insulation and drywall.
- You will most likely spend in the range of $6,000-$8,000 before you get started: We had to pay the architect a few thousand dollars, the same for an engineer/Title 24 (green efficiency report) and permits for the City. Now, you will also be required to pay for a survey of the property to make sure the garage doesn’t cross any neighbor’s property lines (also known as an “encroachment”).
- Keep it simple: Don’t over complicate it. We wanted to make the space feel as large as possible, add the amenities, and leave it at that. Our decisions have been simple and straightforward to make it easy. This includes the finishes. Although we want to make it nice, that doesn’t mean having to spend hundreds of dollars on fancy lighting or custom kitchen cabinetry.
In the last part, I will discuss the finishing stages, and last-minute tips as we get closer to completion.

No responses yet